So, how did we build this thing? Mainly, we spent a long, long time piecing stuff together in the PVC aisle of Home Depot.
Our rain harvester was relatively cheap because we put everything together ourselves. Pre-built systems are really expensive, so you're much better off making something yourself if you're able. As Kelly wrote yesterday, we paid for our barrels but could have found some for free with some more patience and diligence. Provided you can beg, barter, or steal barrels at no cost, a setup as big as ours would cost around $60.
Here's a list of everything we used during construction:
- 10 55-gallon drums
- 4 8ft 2x4s
- 4 8ft 4x4 posts
- scrap lumber
- miscellaneous screws and nails
- cinder blocks
- miscellaneous PVC pipes and fittings
- PVC primer and glue
- rubber gaskets
- 1 roll of that white plumber's tape
- window screen
- chicken wire
- standard spigot
- two-way splitter for spigot
- hose
And the tools we needed:
- drill
- hammer
- hand saw
- large adjustable wrench
- drill bit suitable for going through metal
- Sawzall, also for cutting metal
Our first order of business was to build a platform for the lead barrel and lay out two parallel rails for the rest of the barrels to rest on. We built the platform (or the water tower, as we called it), out of the 4x4 posts and some scrap wood. The rails were made with 2x4s laid out on two rows of cinder blocks.
The second step (and probably the most difficult part of the process) was to connect the lead barrel to the spigot and the first water barre. This required us to goof around with the spacing of the barrels a bit and to make sure we were very precise in our measurements so we could cut the PVC pipes accurately.
The rest of the process was easy. Kelly would fit a T joints to each barrel and pass it off to Steveo and I. We glued a piece of PVC pipe into one end of the T, then Steveo flipped the barrel over and aligned it on the rails, and I glued the piece of pipe to the T of the previous barrel as Steveo pushed the barrels together. I also ran off to take pictures during this process.
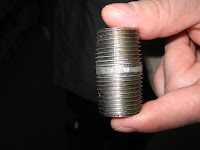
The final barrel in the chain was fitted with a 90° elbow joint, though in retrospect we would have been wiser to use a T so it would be easier to expand the system in the future. Below are close-ups of the various PVC pieces we used (Home Depot is a rotten place for a photo shoot) and a drawing of the system with instructions of how we put all the parts together. Can you tell I totally aced Mechanical Drawing in the seventh grade? Click on any of the pictures to make them larger.

The final step was to cover the open top of the lead barrel with chicken wire, then window screen. This was necessary to keep leaves and stuff from clogging up the pipes and it also prevented the entire thing from turning into a mosquito factory.


6 comments:
Meg + Kelly -
Thanks for the drawing and pictures. Your setup is really great and I'm glad you're sharing it with us.
I'm surprised that the barrels are filled from the bottom. Every design I've seen fills from the top. I presume it works as designed though...
Katie at GardenPunks
Okay, which one of you drew the picture on the graph paper?? Mom
Hello Katie, We're glad to hear that your enjoying the series. The answer to your question about why they fill from the bottom will be addressed in the next post, which covers how the system works.
But to not leave you hanging, water naturally tries to level itself out. The added pressure of the lead barrel helps promote this wonderful bit o' science. It does work fairly well, but as expected, there were a few quirks.
What's up Laurel, Come on, you know Meg did the drawing. The teeny tiny lines should have been a dead give away. It was great hanging out with you and Carol the other day, thanks for the visit.
Yeah, my money was on Meg for the drawing but I didn't know if you had similar talents. Ditto on the visit - BTW - somehow Carol ended up with your pomegranite juice.
P.S. Great series on the rain harvester - one of my friends from my bell choir recently found your blog and told me she is really enjoying it.
Filling from the bottom is a superior design, actually. When you fill in-series barrels from the top, the first barrel has water going to the second barrel and at the same time, going out the overflow. Unless you don't have an overflow on the first barrel, in which case you've got a wet basement.
But I don't understand the rationale for having your lead barrel raised higher. I see no benefit to that. Can you elaborate on your reasons?
Rebecca,
Another benefit of filling from the bottom is that you also drain from the same system of plumbing. It saves on materials and increases pressure.
Post a Comment